PHP & MySQL Tutorial – Part 0.5
Hello New Programmer..
So you are interested in learning PHP & MySQL !. Well I have some good news for you, I’ll try to place here a series of tutorials, where you start from scratch, even if you had never did any web application programming before; you would be able to just start and get some results soon.
Some of the information over here took me a long time to get, especially that when I first started learning PHP; I did by try and error, and by reading stuff from here and there.
Ok, get ready for now, and the most important thing, is to believe that you can do it!! And believe me; yes you can.
Before We Start
You might be wondering right now if you will have to pay any amount as a requirement to build your webpage!. You probably would be thinking that you should buy a domain on the internet! Well the good news is that you can do it all for free!!.
PHP and MySQL are open sources, that means they are free!. The first thing we would do now, is to install on your PC what is required to get started.
The first time I tried to install PHP and MySQL (and Apache Server ~we will discuss this) turned out to be a nightmare (actually they were nightmares!!) Finally I found one magical solution that made my life much easier. That was a free software called WAMP which would install everything and get you ready into programming in less than 5 minutes!.
This software will install Apache server on your PC, this Apache is the application that will turn you PC into a web server (literally).
For now, go to the below link, download this program and just install it on your PC. (And trust me, nothing wrong will happen)
http://www.wampserver.com/en/download.php
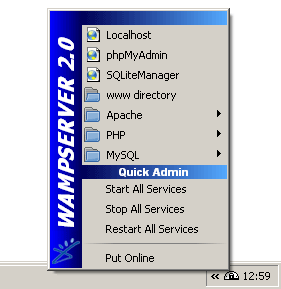
After installation is completed, you will see a small a new white icon in your system Tray. This icon should turn completely white (Not yellow, nor red).
Having this icon white means that you are ready to Rock & Roll!
What is all about?
Before we dig into the subject, it’s good to know what type of different web pages you usually face while browsing the net. There are mainly two types of web pages, static and dynamic.
Static Pages are just as their name indicates, they are static!! This means there is no interaction between the user and those pages, their display is usually fixed, and fields to enter any information, (Such as name, email, etc…). Beside that their contents will change only if the person who made them opened those files and updated them.
Such kind of web pages are fine if you were planning to have fixed contents on your website. Such as making a site to display one story and that’s it.
The website will be made using HTML script. To make such a page you don’t really need to learn the HTML script. An easy way to do it, is to use Microsoft Word, crate whatever document you like, and then finally save it as HTML. This saved file can be used as website file.
Well, for today we are going to try create a static web page, and we will use our newly installed WAMP server to demonstrate how it’s going to be used later on.
Open Microsoft Office
On a new file type down:
Hello World !!
Use any font and size you like.
Then FileàSave AsàWeb Page (*.html, *.htm) name the file as index.html
Save the file on the desktop for now. (Note: You might get a warning letter, just click yes).
Copy the index.html file that you had just created, and copy it to the below folder on your PC.
C:\wamp\www
Well, as you guessed, this folder is inside the newly magical installed program, and www folder would represent your web server root folder! (Cool right!).
Now, go to your web browser (Internet Explorer or FireFox) and write down the below address:
And voila!!
Fine below some answers for the questions that you had been thinking about:
| Why http://localhost/ | Well the server is installed on you PC, and the default address for it would be localhost (Local Host). |
| Why
index.html |
Notice that you had typed the address as http://localhost/only without specifying the file name. Well files with index are the default files to be displayed when you enter the web address name. This means when you visit a website let us say www.antcircuits.comthe first web page to be displayed has the name index. (More details about this later). |
As an exercise for you now, try to make another web page, and call it test.html
You should place it in the same folder i.e. C:\wamp\www
And then to access it through your web browser, you will need to type the below address:
I believe this is enough for today, next tutorial we will start little bit with PHP.
Keep the good work, and don’t forget to brush your teeth before you sleep!. And if you have idiots at your work place, just try as much as possible to ignore them!.